Posts Tagged ‘computer graphics’

AC3D Plugin: Material by Crease Angle and Planar Map by Material

Monday, June 15th, 2009

Two new plugins today!

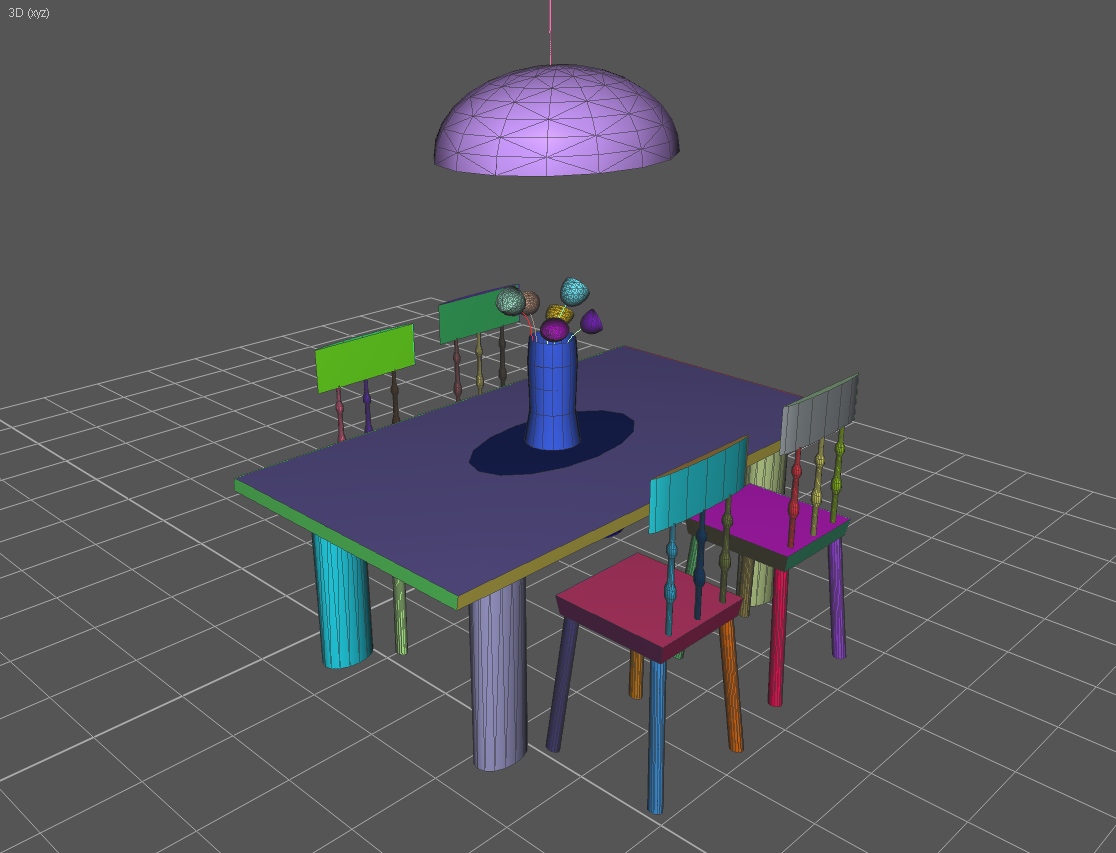
The first plugin, Set Material by Crease Angle, sets the materials of a model based on the crease angle of the mesh. For each selected area, the plugin creates a new color in the palette and “flood-fills” the area until the angle between the surfaces exceeds the crease angle of the mesh. The result is that contiguous areas are all set with the same palette material, and a new material is applied wherever a discontinuity occurs. This allows you to easily break a model into sections along its creases for easier texture mapping, or many other purposes.

The second plugin, Planar Map by Material, actually includes three new commands.

The first command is Fit UV Coordinates to Map. This command is essentially the same as the “max” button in the TCE, forcing all UV coordinates into the 0-1 range, but unlike “max” this scales the map proportionally instead of independently on each axis.

The second command is Adjust UVs for Bilinear Filter. This is useful for game developers. This command scales your texture coordinates by a ratio of 240/256. The purpose is to create a small seam along the edge of the texture map so that if your game is using mipmapping with a bilinear or trilinear filter, the texture won’t bleed into its neighbors in your texture cache nor will it bleed into itself if you haven’t clamped the edges.

The last command, Planar Map by Surface Material, is probably the most useful of the three. Planar Map by Surface Material applies a “best fit” planar projection to all surfaces grouped by material in the current selection. If you section your model by material, this will treat each material color as a contiguous group and apply whichever planar projection fits it best in the TCE. You’ll still need to do some manual adjustment after you map it this way–especially texture packing, as this leaves plenty of room between areas so the surfaces aren’t too difficult to select–but it can save a lot of time in laying down a base mapping before you manually refine each area.

More information about each plugin is available in the readme.

Download the Material by Crease Angle plugin. (Requires Windows XP, AC3D 6.2 or above.)

Download the Planar Map by Material plugin. (Requires Windows XP, AC3D 6.2 or above.)

AC3D Plugin: Displacement Mapper

Tuesday, May 13th, 2008

This plugin adds displacement map support to AC3D. Displacement mapping is a technique that deforms the current geometry, displacing the vertices in accordance with elevation values stored in a texture map. This technique is useful for “painting on” details onto a very high resolution mesh.

Displacement maps can be painted with 2D art tools such as Corel, Photoshop or Gimp; or, they can be exported from 3D sculpting programs such as ZBrush or Mudbox. The AC3D displacement map plugin supports 8-bit grayscale and 16-bit red-green (POV-Ray format) displacement maps.

If you are new to displacement mapping, this tutorial explains the process in more detail.

Download the plugin. (Requires Windows XP, AC3D 6.2 or above.)

Fake Toon Outlines

Wednesday, May 7th, 2008

Here’s a fun one! Ever wanted to re-create the look of heavy “toon” outlines, but didn’t have a shader for it? Believe it or not, there’s an easy way to fake it using fixed-function only.

Here’s how to do it:

  • Make sure all your surface normals are unified (facing outwards) and your polygons are set to 1-sided
  • Make a copy of your object and resize it so it is ever-so-slightly larger than the original
  • On the copy, set the surface material to black
  • Invert the surface normals

That’s it! Nifty, eh? The method’s not perfect–for best results, stick to convex objects–but it’s great for quick renders and on limited hardware platforms where shaders aren’t an option.

AC3D Plugin: Reparent Object

Tuesday, April 1st, 2008

This is actually a really old plugin, but it still has its uses. This plugin allows you to change the parent of a mesh or group by entering the name of the desired parent group in a dialog box. You can accomplish more-or-less the same thing via drag and drop in the hierarchy menu already, but it’s still handy when you have a really complex setup and don’t want to hunt through the list to find what you’re looking for.

Download the plugin. (Requires Windows XP, AC3D 6.2 or above.)

How to Cut Edges and Add Loops in AC3D

Saturday, March 22nd, 2008

From time to time, people ask me how to “cut edges” in AC3D since the way AC3D handles edges is a bit different than other programs. Usually, I use the Divide Loop plug-in which is normally the fastest, easiest way to go. But, every now and then you get an edge that isn’t well suited for Divide Loop. In these cases, I use a combination of Insert Vertex and Slice Surface.

This video shows you how:

Click to Download Video

A QUICK SIDE NOTE: It is much faster to use the hotkeys (ctrl+shift+I and ctrl+shift+L) than it is to use the menus… the whole process can be completed in only a few seconds if you use the hotkeys. However, for the sake of clarity, I use the menus in the video so you can actually see what I’m doing. 🙂