Posts Tagged ‘tutorial’
Thursday, April 2nd, 2009
A wine glass is one of the first things most people make when they learn to use a 3D program. It’s fun and it’s easy.
Making a sculpted prim wine glass for Second Life is equally fun. In fact, it’s almost exactly the same except you need to UV map it before you upload it. A simple cylindrical map will do. Here’s a video to show you how using AC3D.
Click to download video
The step-by-step:
- Draw a polyline that will form the outer edge of your wineglass.
- (Optional) Use the spline tool to make your polyline into a smooth curve.
- Revolve the polyline around the Y axis 360 degrees. The more segments you use the smoother it will be, but the more polygons. You don’t need very many polygons, so don’t overdo it.
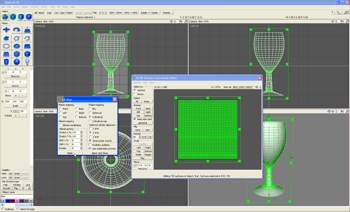
- Using the UV map tool, apply a cylindrical wrap around the Y axis.
- Export!
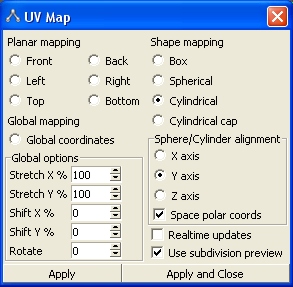
Here are the UV map settings I used.
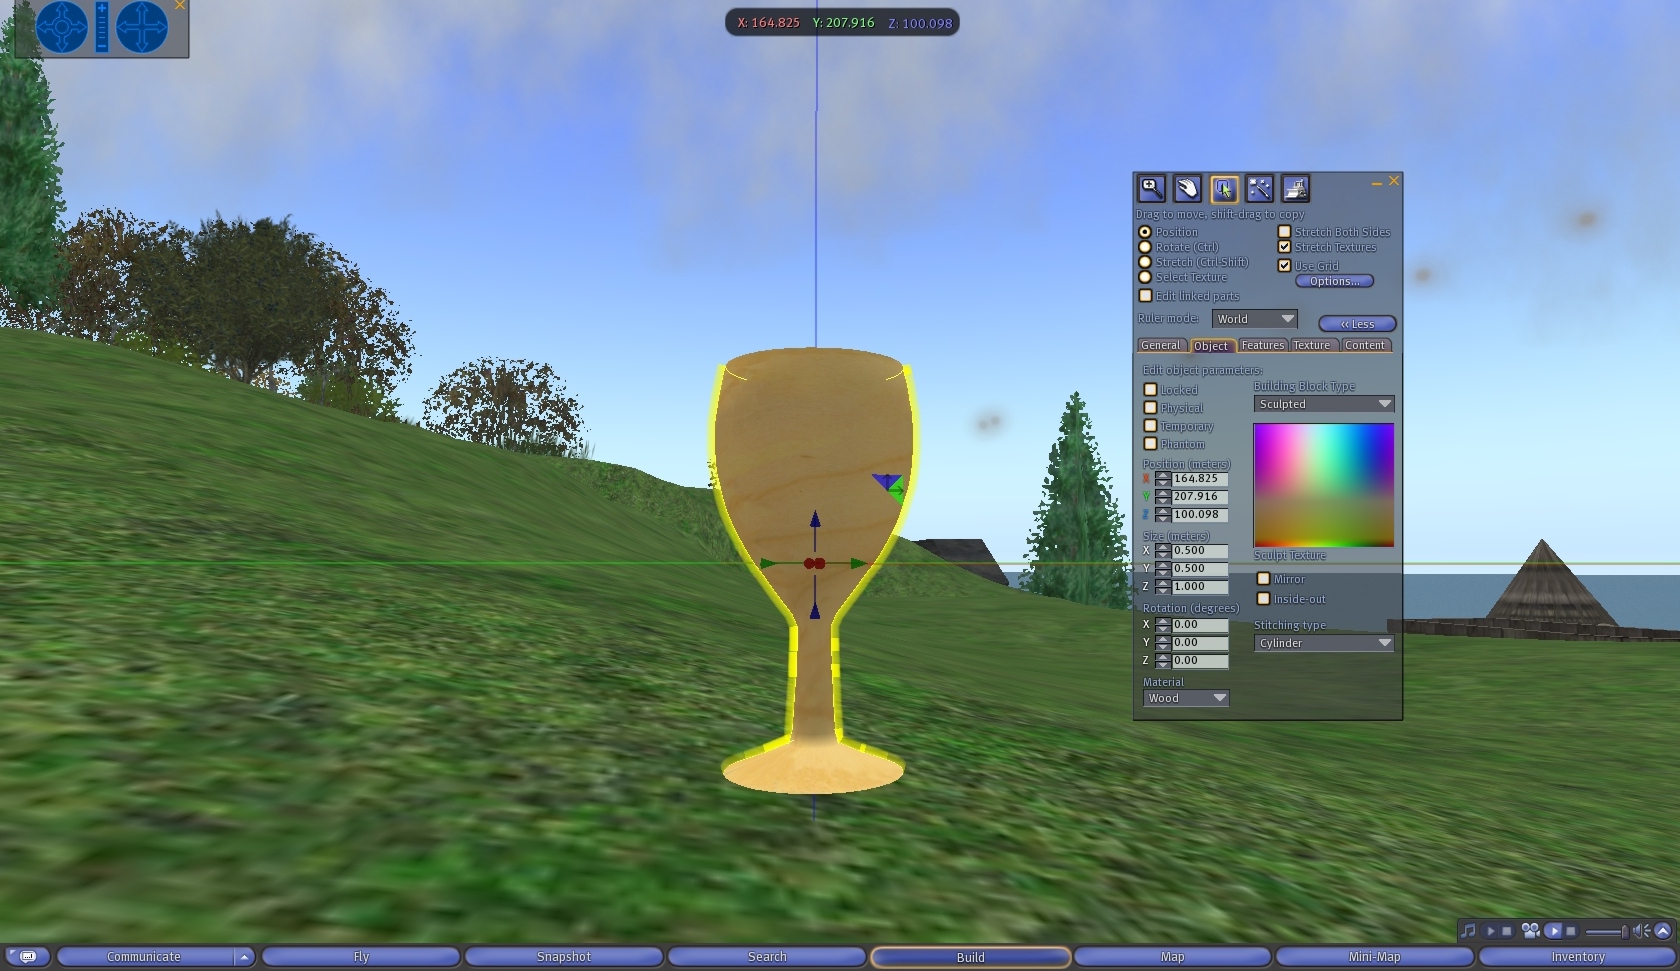
When you import it into SL, be sure to set your mapping mode to cylindrical. If you don’t, the top and bottom of the glass will be solid instead of hollow.
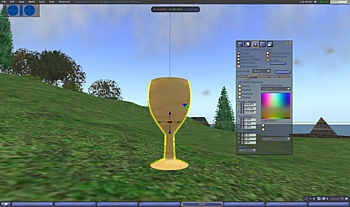
Set the Stitching Type to Cylinder.
Download the model here.
Tags: 3d, ac3d, sculpted prim, sculpty, second life, SL, tutorial, wine glass
Posted in 3D Tutorials, General, Second Life | 1 Comment »
Wednesday, August 13th, 2008
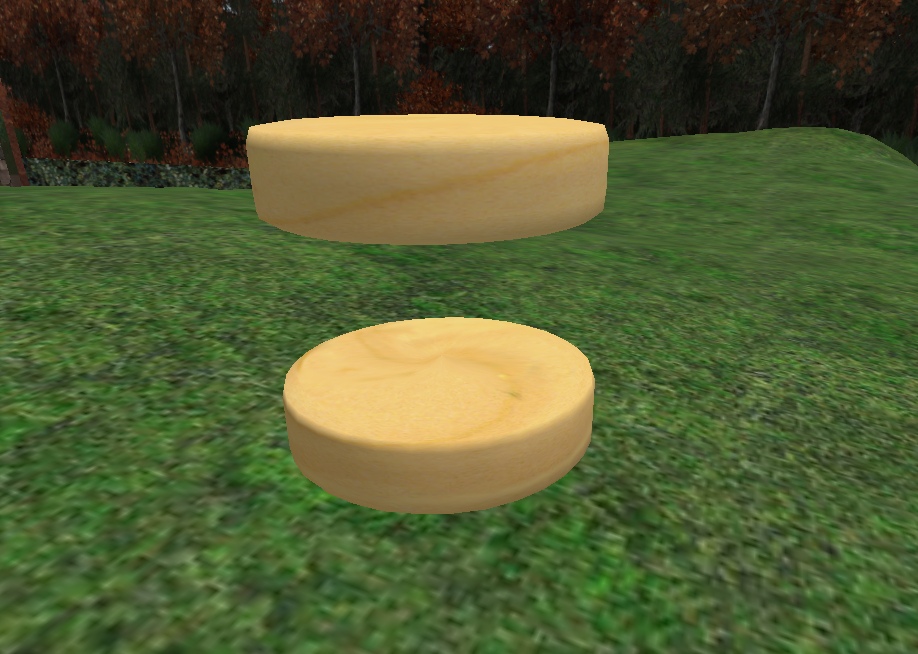
Many times people ask me if it’s possible to create two disconnected shapes from one sculpted prim–without resorting to alpha maps. The answer is yes, you can! It can be a little tricky depending on the shape, but it absolutely can be done. Today I’ll show you how using the AC3D exporter.

Two disconnected shapes made with one sculpted prim.
(more…)
Tags: 3d graphics, 3d modeling, ac3d, sculpted prims, sculpties, second life, SL, tutorial
Posted in General, Second Life | 4 Comments »
Saturday, March 22nd, 2008
From time to time, people ask me how to “cut edges” in AC3D since the way AC3D handles edges is a bit different than other programs. Usually, I use the Divide Loop plug-in which is normally the fastest, easiest way to go. But, every now and then you get an edge that isn’t well suited for Divide Loop. In these cases, I use a combination of Insert Vertex and Slice Surface.
This video shows you how:
A QUICK SIDE NOTE: It is much faster to use the hotkeys (ctrl+shift+I and ctrl+shift+L) than it is to use the menus… the whole process can be completed in only a few seconds if you use the hotkeys. However, for the sake of clarity, I use the menus in the video so you can actually see what I’m doing. 🙂
Tags: ac3d, cg, cgi, computer graphics, cut edge, divide loop, insert vertex, slice edge, surface, tutorial, vertice
Posted in 3D Tutorials, General | Comments Off on How to Cut Edges and Add Loops in AC3D
Wednesday, January 30th, 2008
The tiny little 320×240 render of the plasma for the POV-Ray tutorial was a bit hard to see, so I did a render in 1920 x 1080 resolution for those of you interested in seeing the details. It’s still a bit compressed, but the image is a lot clearer. You’ll find it here: download the video.
Enjoy!
Tags: 1080p, cg, cgi, computer graphics, explosion, hd, media, plasma, POV-Ray, tutorial
Posted in 3D Tutorials, General | Comments Off on Plasma HD Render
Friday, November 2nd, 2007
This step-by-step guide will show you how to make a torus in AC3D using the Revolve tool.
(more…)
Tags: 3d modeling, ac3d, cg, conic section, graphics, how to, torus, tutorial
Posted in 3D Tutorials, General | Comments Off on How to Make a Torus